 Tweet
Tweet
As promised, here is a simple lesson on how to store ammo long term.
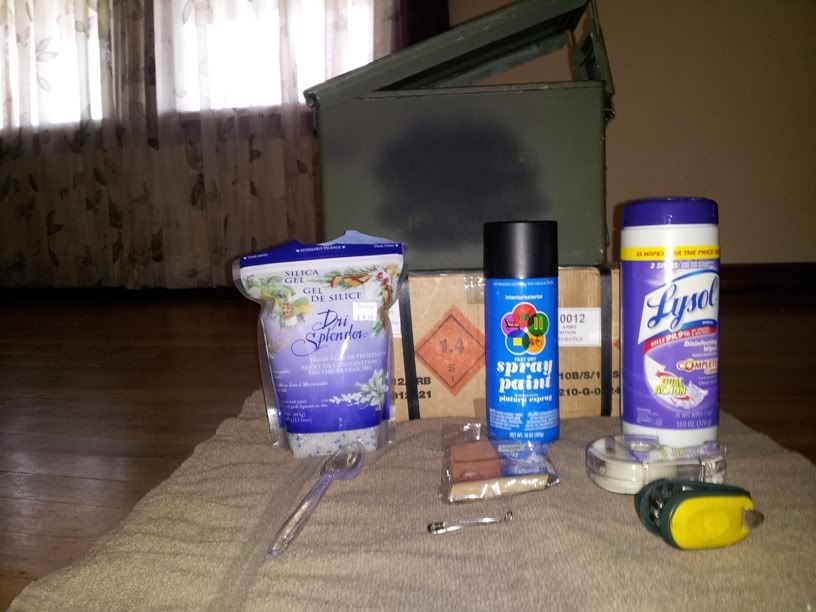
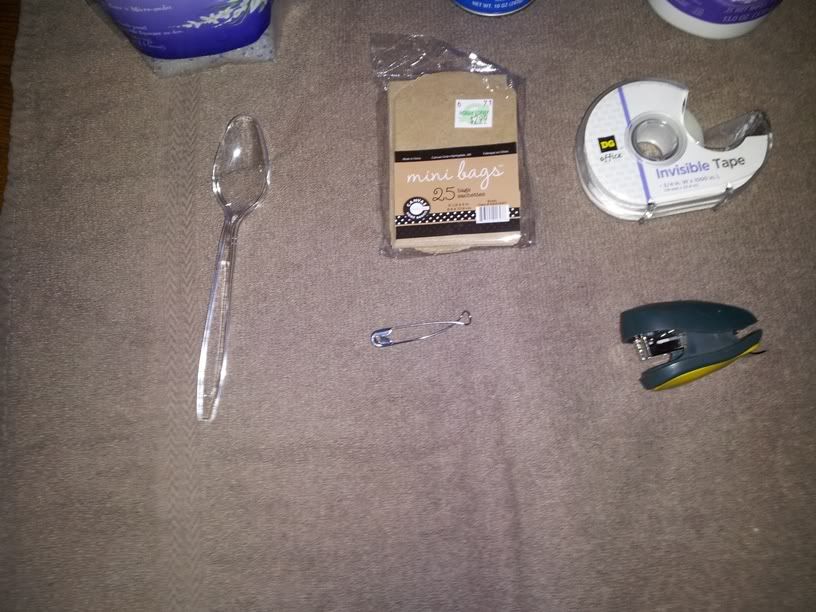
Materials needed: Ammo can, ammo, small paper craft bag, silica gel (flower drying art type), Scotch tape or staples, needle or pin, spoon, towel, paint, duct/masking tape or labels or stencil kit, marker, general household cleaner and cleaning rag or cleaning wipes, newspaper or painting drop cloth.
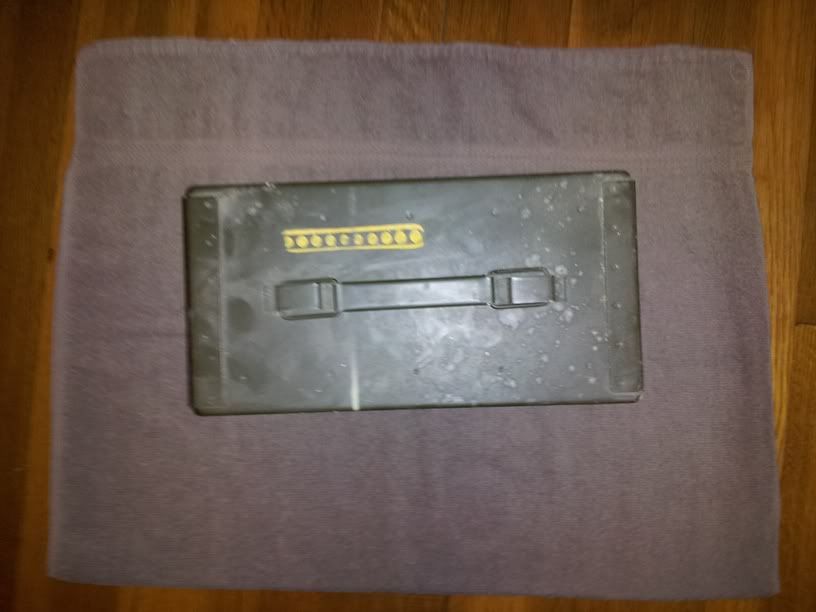
1. Prepping your can. A lot of times one can get the cans from online vendors and sometimes they come in pretty bad shape, i.e. rusting or needing cleaning from built up dirt. While most of the time the interior is clean, it never hurts to take it outside and knock off the loose dirt and get it prepared for storage. Here's an example of a dirty can:
Inspect the outside and inside of the can itself. Ensure there aren’t any holes or areas that have rusted through. Inspect the lid and rubber gasket. Make sure the rubber hasn’t hardened and will allow a good seal. Mate the two up and ensure the pins that hold the lid on are not twisted and will allow free movement of the lid back and forth. If you really get serious about it, you can put about an inch of water I the bottom of the can, seal it up and turn it over. If it doesn’t leak (which it shouldn’t) you will be good to go. I don’t necessarily recommend this, but it’s something you can do to make sure the seal is good. Allow to dry thoroughly if you do this
Cleaning the interior and exterior of the can is generally done with general purpose household cleaner and a rag. You can also use the premade cleaning wipes. Pay particular attention to the rubber gasket on the lid being clean. A little dirt isn’t a huge deal, but a lot of it will prevent a good seal from happening and allow additional moisture into the can. Wipe off all excess dirt and debris and allow to dry.
If you have major rust spots, it’s highly recommended you paint over the area after cleaning. It also doesn’t hurt to go ahead and take a wire brush and knock off the large portions of affected areas. Paint as necessary/needed. Color doesn’t matter unless you really want to match colors with the original. I tend to stick to whatever rattle can of paint I happen to have around. Just enough to cover the affected area and allow to dry. Additionally, I will paint over the old markings on the outside of the can, caliber and lot number info especially if the ammo is different from what I’m storing. Neatness doesn’t really count for a lot since they are going into storage, but your preference on this. Paint and allow to dry.
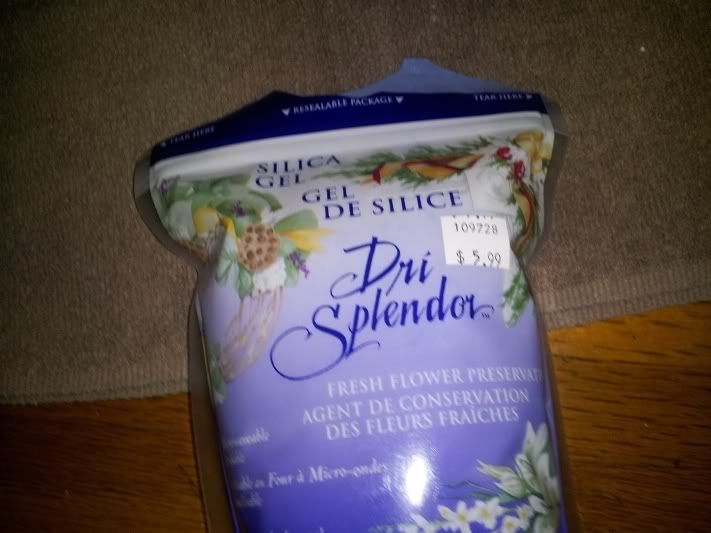
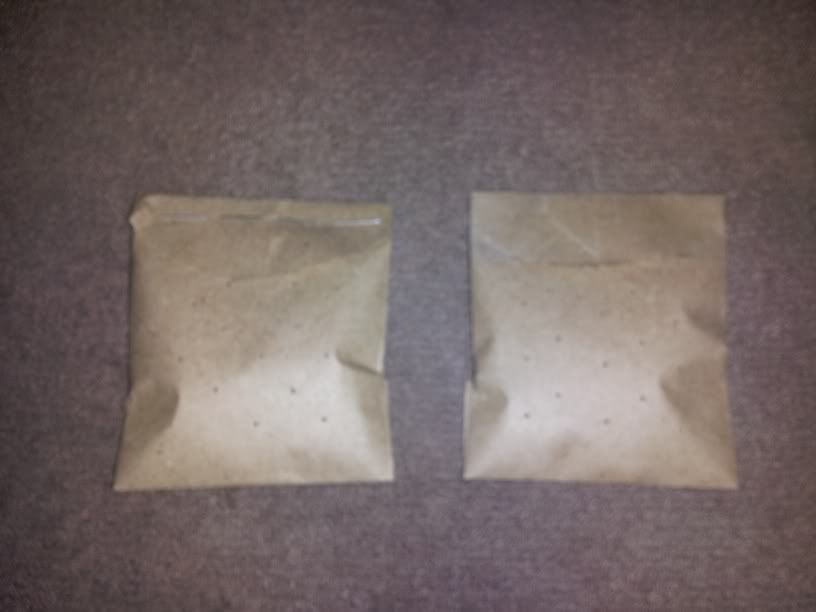
2. Prepping your desiccant packs. Instead of spending money buying desiccant packs from online vendors at a minimum of $3.50 per pack, I’ve learned to make my own. Also, some people like to reuse the ones that come in electronics or other packages, but I tend not to trust them since I have no idea how old they are and how long they have been exposed to humidity and moisture. Call me untrusting, but I have no idea if they have been sitting in a warehouse for several months in Florida or Texas, so I make my own. For the homemade desiccant bags, I use the small paper craft bags and silica gel that’s used to dry flowers.
The bags can be bought at any number of craft type stores like Michaels or Hobby Lobby and general come 25 to a pack. Take one bag and place on top of a folded towel. Use the pin or needle to poke about fifteen holes or more all the way through the bag at random spots. Make sure the bag doesn’t tear during this process. This allows air to get into the bag and clean the unwanted moisture out.


The silica gel is generally marked as the flower drying type that works perfectly fine for what you are using it for. A 1.5 pound bag will last you a long time. I use the bead type myself since it prevents the silica from escaping from the bag especially after you put the pin holes in the bag. Use about two or three spoonful’s for each bag. After putting in the silica, seal the top of the bag with staples or with Scotch tape. Use enough to prevent the bag from coming open and the silica spilling out. I’ve found the staples to be easier to use rather than the tape, but it comes down to personal preference.
Generally, one bag is all that is needed per can, but those in more hot and humid environments might put two in just in case. You can reuse the silica packets unless exposed to humidity for long periods of time or when they get wet. In the particular brand I use, you can reheat the crystals to take the moisture out. Plus, the blue ones are the indicators of when to change it out. If they turn pink, they have gotten all the moisture they can handle. Reuse as directed on the package or discard.
3. Prepping your ammo. It’s a good idea to inspect your ammo both prior to storage as well as prior to use. Even factory loads can get serious dents and dings in the cases, rounds seated too far in the case, loose rounds, etc. It might take a while to check all them out, but it’s worth the extra effort. I especially recommend this with reloads even from reputable dealers. Generally factory loaded ammunition is good to go, but never hurts to check.
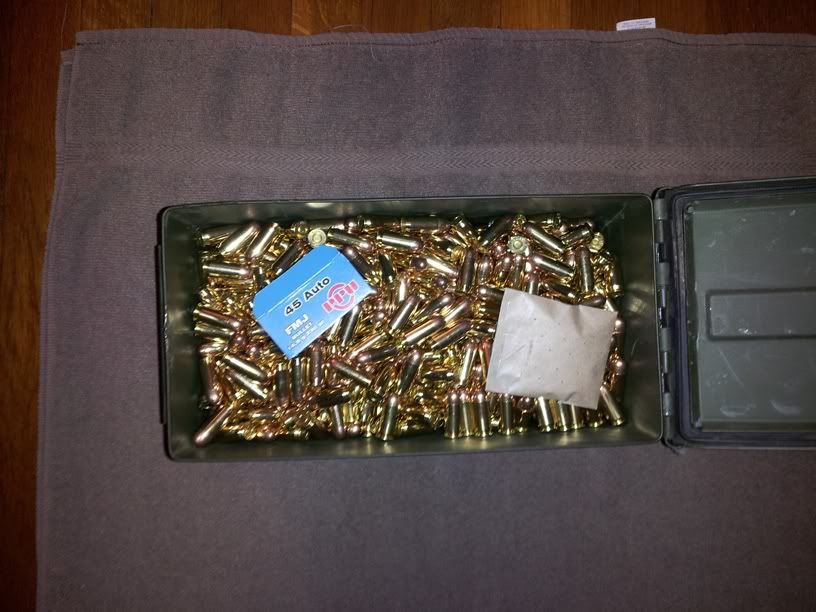
Additionally, check the lot numbers on the boxes to ensure the lots are the same prior to storage. It is not recommended to mix lots in bulk packing unless the original packaging is used. Make sure you keep at least one copy of the lot number from the box to check in case of recalls. The lot number is circled in red here:

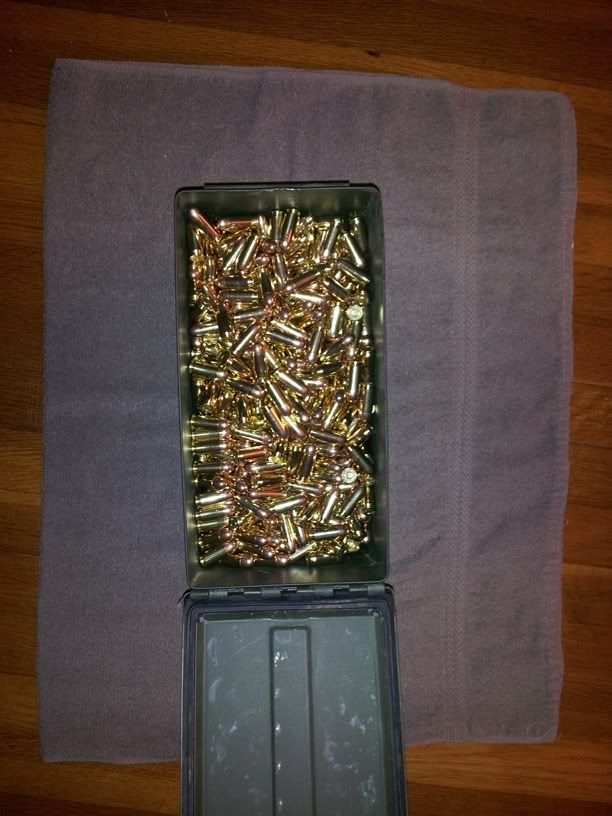
But will vary by manufacturer. Once everything has been inspected, you can remove the packaging and the interior plastic holders and dump the ammo into the can. Once completed, take one desiccant pack and add to the top as well as the copy of the lot number. I generally cut off the lot number, manufacturer info and caliber and leave on top with the pack. Seal can and shake slightly to get the ammo settled.
Marking your cans. Some folks like to stencil in the caliber on the can for easy identification. Others like to use shipping type labels or you can use masking/duct tape. I use masking tape since it’s easier to remove and not as messy as duct tape in the long run. Your choice on how to mark it, but I tend to include the following information as a minimum: manufacturer, caliber, grain weight, round type (FMJ, JHP, etc) and month/year packed. So for today’s pictorial, the label will be “Prvi Partizan, .45 ACP, 230 grain FMJ, June 2012.” I used to include the lot numbers, but have since put them inside the can in case the labels get damaged for some reason. Never hurts for two places though.

Ammo should be stored in a cool dry spot and not subjected to rapid heat changes or in direct sunlight. A basement or cellar is ideal. I personally wouldn’t stack over five cans high myself as the stack can become unstable and fall over. And with larger rounds, you are talking pretty good weight coming down on your foot or maybe a child. Also, it’s good to get the can off the concrete by using a wood slat. An old slat from a wood pallet works ideal for getting it off the ground. Provided these are ideal conditions and ammo shoots just fine after being stored in non-climate controlled places and in direct sunlight. But erring on the side of caution isn’t a bad thing.
So now you have your ammo stored in a moisture controlled environment. Ideally, you wouldn’t need to check it until use and it’s not a good idea to open and close them repeatedly. If you are rotating through your ammo, pick one can and use that up before opening a new can. Repeatedly exposing the ammo to the air outside the can will lessen the life of the desiccant packs and potentially cause corrosion with the rounds themselves.
Additionally, this is the same process I used when I stored my ammo and headed overseas. After five years, the ammo was perfectly fine and no different than the day I packed it.
Materials needed: Ammo can, ammo, small paper craft bag, silica gel (flower drying art type), Scotch tape or staples, needle or pin, spoon, towel, paint, duct/masking tape or labels or stencil kit, marker, general household cleaner and cleaning rag or cleaning wipes, newspaper or painting drop cloth.
1. Prepping your can. A lot of times one can get the cans from online vendors and sometimes they come in pretty bad shape, i.e. rusting or needing cleaning from built up dirt. While most of the time the interior is clean, it never hurts to take it outside and knock off the loose dirt and get it prepared for storage. Here's an example of a dirty can:
Inspect the outside and inside of the can itself. Ensure there aren’t any holes or areas that have rusted through. Inspect the lid and rubber gasket. Make sure the rubber hasn’t hardened and will allow a good seal. Mate the two up and ensure the pins that hold the lid on are not twisted and will allow free movement of the lid back and forth. If you really get serious about it, you can put about an inch of water I the bottom of the can, seal it up and turn it over. If it doesn’t leak (which it shouldn’t) you will be good to go. I don’t necessarily recommend this, but it’s something you can do to make sure the seal is good. Allow to dry thoroughly if you do this
Cleaning the interior and exterior of the can is generally done with general purpose household cleaner and a rag. You can also use the premade cleaning wipes. Pay particular attention to the rubber gasket on the lid being clean. A little dirt isn’t a huge deal, but a lot of it will prevent a good seal from happening and allow additional moisture into the can. Wipe off all excess dirt and debris and allow to dry.
If you have major rust spots, it’s highly recommended you paint over the area after cleaning. It also doesn’t hurt to go ahead and take a wire brush and knock off the large portions of affected areas. Paint as necessary/needed. Color doesn’t matter unless you really want to match colors with the original. I tend to stick to whatever rattle can of paint I happen to have around. Just enough to cover the affected area and allow to dry. Additionally, I will paint over the old markings on the outside of the can, caliber and lot number info especially if the ammo is different from what I’m storing. Neatness doesn’t really count for a lot since they are going into storage, but your preference on this. Paint and allow to dry.
2. Prepping your desiccant packs. Instead of spending money buying desiccant packs from online vendors at a minimum of $3.50 per pack, I’ve learned to make my own. Also, some people like to reuse the ones that come in electronics or other packages, but I tend not to trust them since I have no idea how old they are and how long they have been exposed to humidity and moisture. Call me untrusting, but I have no idea if they have been sitting in a warehouse for several months in Florida or Texas, so I make my own. For the homemade desiccant bags, I use the small paper craft bags and silica gel that’s used to dry flowers.
The bags can be bought at any number of craft type stores like Michaels or Hobby Lobby and general come 25 to a pack. Take one bag and place on top of a folded towel. Use the pin or needle to poke about fifteen holes or more all the way through the bag at random spots. Make sure the bag doesn’t tear during this process. This allows air to get into the bag and clean the unwanted moisture out.
The silica gel is generally marked as the flower drying type that works perfectly fine for what you are using it for. A 1.5 pound bag will last you a long time. I use the bead type myself since it prevents the silica from escaping from the bag especially after you put the pin holes in the bag. Use about two or three spoonful’s for each bag. After putting in the silica, seal the top of the bag with staples or with Scotch tape. Use enough to prevent the bag from coming open and the silica spilling out. I’ve found the staples to be easier to use rather than the tape, but it comes down to personal preference.
Generally, one bag is all that is needed per can, but those in more hot and humid environments might put two in just in case. You can reuse the silica packets unless exposed to humidity for long periods of time or when they get wet. In the particular brand I use, you can reheat the crystals to take the moisture out. Plus, the blue ones are the indicators of when to change it out. If they turn pink, they have gotten all the moisture they can handle. Reuse as directed on the package or discard.
3. Prepping your ammo. It’s a good idea to inspect your ammo both prior to storage as well as prior to use. Even factory loads can get serious dents and dings in the cases, rounds seated too far in the case, loose rounds, etc. It might take a while to check all them out, but it’s worth the extra effort. I especially recommend this with reloads even from reputable dealers. Generally factory loaded ammunition is good to go, but never hurts to check.
Additionally, check the lot numbers on the boxes to ensure the lots are the same prior to storage. It is not recommended to mix lots in bulk packing unless the original packaging is used. Make sure you keep at least one copy of the lot number from the box to check in case of recalls. The lot number is circled in red here:
But will vary by manufacturer. Once everything has been inspected, you can remove the packaging and the interior plastic holders and dump the ammo into the can. Once completed, take one desiccant pack and add to the top as well as the copy of the lot number. I generally cut off the lot number, manufacturer info and caliber and leave on top with the pack. Seal can and shake slightly to get the ammo settled.
Marking your cans. Some folks like to stencil in the caliber on the can for easy identification. Others like to use shipping type labels or you can use masking/duct tape. I use masking tape since it’s easier to remove and not as messy as duct tape in the long run. Your choice on how to mark it, but I tend to include the following information as a minimum: manufacturer, caliber, grain weight, round type (FMJ, JHP, etc) and month/year packed. So for today’s pictorial, the label will be “Prvi Partizan, .45 ACP, 230 grain FMJ, June 2012.” I used to include the lot numbers, but have since put them inside the can in case the labels get damaged for some reason. Never hurts for two places though.
Ammo should be stored in a cool dry spot and not subjected to rapid heat changes or in direct sunlight. A basement or cellar is ideal. I personally wouldn’t stack over five cans high myself as the stack can become unstable and fall over. And with larger rounds, you are talking pretty good weight coming down on your foot or maybe a child. Also, it’s good to get the can off the concrete by using a wood slat. An old slat from a wood pallet works ideal for getting it off the ground. Provided these are ideal conditions and ammo shoots just fine after being stored in non-climate controlled places and in direct sunlight. But erring on the side of caution isn’t a bad thing.
So now you have your ammo stored in a moisture controlled environment. Ideally, you wouldn’t need to check it until use and it’s not a good idea to open and close them repeatedly. If you are rotating through your ammo, pick one can and use that up before opening a new can. Repeatedly exposing the ammo to the air outside the can will lessen the life of the desiccant packs and potentially cause corrosion with the rounds themselves.
Additionally, this is the same process I used when I stored my ammo and headed overseas. After five years, the ammo was perfectly fine and no different than the day I packed it.


Comment